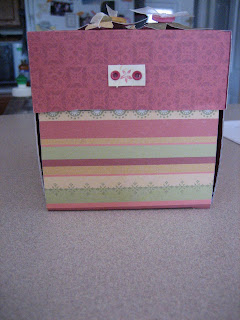


I got this idea from a friend. I didn't have a template or directions so I just winged it. But I think it turned out super cute! What a great gift idea! What you will need: 7 sheets of 12x12 DP, Glue dots, cutter, double sided tape or other adhesive, and embellishments and ribbon of your choice.
Starting with your 12x12 paper, I drew the template on the back of each sheet. the first two sheets are the first layer of the box and it measures 4x4 when put together. the next layer measures3 3/4x 3 3/34, The last layer measures 3 1/2 x 3 1/2. Now if you want the template just leave a comment and I can upload or send you a picture of it. Each layer also get just about 2/8 of an inch shorter as they go in. Once all paper is cut then I taped them together in the center. Now you should only have one piece of DP left and that is for the top of the box. Mine measured out to be I think 4 1/4 x 4 1/4. These are the finished measurements by the way. Once the box was all assembled I put different embellishments on it and I made the flowers that sit on top of the box. So take a look at the pictures and let me know if you have any questions. This project took me about 2 hours to make, but now that I have the template and know what I am doing the second one won't take quite as long maybe 30-45 minutes start to finish.


No comments:
Post a Comment