All the mommy blogs that I read tend to publish recipes, menus and shopping lists for a week. I get so many good ideas from these people that I decided to try and do it myself. My menus will include recipes from various cookbooks, blogs, family, and some of my own. It will also include lunch ideas and snacks for the week. If I get the recipe from someone's blog then I will link to it! Anyways, your feedback is more than welcome. I will try and makes things as easy as possible and I hope you enjoy this weeks menu!
1) Loaded Baked potatoes with homemade cheese sauce!
2) Chicken Satay with Balinese Peanut Sauce
3) Lasagna with Garlic bread
4) Tex Mes Chicken and Rice
5) Chicken Garden Pizza
Lunches this week include:
Peanut butter and jelly sandwhiches
Fish sticks and mac and cheese
Chef salads
Deli sandwhiches
Left Overs
Snacks and sides for lunches include:
Fresh fruit (strawberries, bananas, apple slices etc..)
String cheese
Pickles (we all love pickles =))
Sun chips
Cheese and crackers
Popcorn
Mixed nuts
That about does it I think. Enjoy and Happy cooking. Please feel free to ask questions if you have them!
Showing posts with label Weekly Menus. Show all posts
Showing posts with label Weekly Menus. Show all posts
Thursday, May 27, 2010


Menu for Jason's Birthday Party!
Jason is turning 27 this year and I am throwing him a party laid back style since I know he is not that big into parties. Here is a sneak peak of some of the things on the menu!!!
Meat:
Beer Brats
Cheeseburgers
Hot Dogs
Desserts:
Mini Root Beer Float cupcakes
Chocolate Peanut Butter Cup Torte
Strawberry Angel Food Cake Truffle
Sticky Cinnamon Rolls
S'mores
Sides:
Homemade potato skins and Sweet Potato chips
Deviled eggs
Strawberry spinach salad
Drinks:
MGD keg
Sweet tea
Lemonade
Pop
Water
Then I have some people who are attending bringing side dishes! I am so excited, the food is going to be sooo good!!!
Recipes, menus, and more
I read a lot of mommy blogs! Something that I love about all of them is that they always share their weekly menus, favorite recipes, little tricks to make cooking easier and faster, and shopping lists. I love that they do this because it helps me plan my weekly menus, meals and snacks. When I do this I find that I spend less money and I buy healthier things for meals and snacks. The last couple of weeks I have gotten lazy about planning a menu. Which, fine we were traveling and camping and what not, but now I don't have an excuse not to do it. So tonight I will be working on my menu for the week and I want to start sharing my menus with you! Whether you use one recipe, or the whole menu I hope that it will help you in some way to stay on budget, to eat healthier foods and snacks and in the long run save time and money! I will try and make it as simple and easy as possible for you! I will also be doing some rearranging on my blog, maybe adding some tabs and folders so check back for the changes and menu tonight!
Wednesday, January 20, 2010
Steak Gorgonzola!
YUM! Can I say again YUM!!!! I have been getting almost if not all of my meal ideas from this blog that I am absolutely in love with. Well Monday night Italian food sounded really good and I remembered that one of the meals on my list was Penne Gorgonzola! Score! Well the recipe called for chicken but I was craving steak so Jason fired up the grill and made to delicious fillets! While he was doing that I worked on the pasta. Here is the recipe ! It was sooooo easy to make and it was soooo good! I almost always get the steak Gorgonzola when we go to the olive garden, and I think this recipe even tops that! I would however recommend measuring out the Gorgonzola cheese, it calls for 5oz and my package was 8 ounces and I just eye balled it and though it was still really yummy, I could tell there was a little to much of it in there. I think next time I make it I am going to add red peppers and maybe some broccoli.
If you have some time look around on the eat at home cooks blog! You will find some great recipes. Jason and I would highly recommend the Peanut Butter and Jelly muffins! They are so good! Enjoy!!!
If you have some time look around on the eat at home cooks blog! You will find some great recipes. Jason and I would highly recommend the Peanut Butter and Jelly muffins! They are so good! Enjoy!!!
Tuesday, February 10, 2009
Crimped Envelope Card!
I tried this new technique this week and loved it! It was so easy and simple to do, this is not my card, but here are the directions and I will post a photo of my card in the morning! Have fun and happy stamping!
Create a pouch out of a regular envelope.
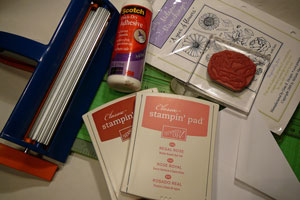
Supplies
- A2 size Envelope
- Paper Trimmer
- Crimper
- Adhesive
- Stamps>>(Gina K. stamp set A Year of Flowers used here)
- Cardstock (for insert)
Step-by-Step
-
Step 1
Seal the envelope.
Use your paper trimmer to cut 1 1/4" from one of the short sides of the envelope.
The narrow piece will be the topper and the larger piece will be the crimped pocket portion of the card.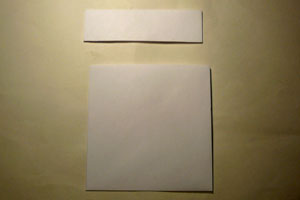
-
Step 2
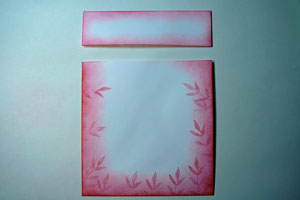
Decorate both pieces with stamps, keeping in mind that the bottom piece will be crimped and the images may be slightly distorted.
-
Step 3
Place the larger piece into the crimping tool with the opening to the side, and crimp.
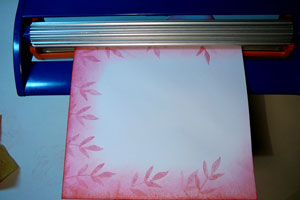
-
Step 4
Add stamped/cut images, die cuts and embellishments as desired.
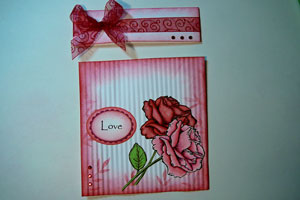
-
Step 5
To create the insert, cut a piece of card stock to 4" by 4 1/4".
For a layered look, cut additional pieces slightly smaller.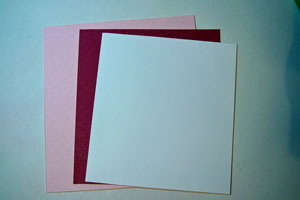
-
Step 6
Stamp and embellish insert as desired.

-
Step 7
As a variation you can scale the project down to create gift card holder.
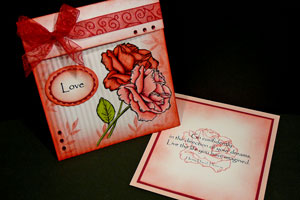
Subscribe to:
Posts (Atom)

 Posts